
- Help Center
- Payments
- Settings and Setup
-
Getting Started
-
Users and Login Information
-
Templates and Messages
-
Schedule and Online Appointment Booking
-
Patient Information
-
Online Forms
-
Reputation
-
Practice IQ
-
Revenue IQ
-
Tasks
-
Phone IQ
-
Marketing IQ
-
Patient Flow
-
Payments
-
PBN Settings
-
Enterprise Pages
-
Eaglesoft Best Practices
-
Open Dental Best Practices
-
Dentrix Best Practices
-
Product Releases
-
Known and Resolved Issues
-
Additional fees and overages
-
PBN Apps
-
Insurance Verification
-
FAQ's
-
Patient Portal
Payments - Settings
Settings setup for Payments
Before you begin processing payments, checking your Settings tab on the Payments page is essential. On the Settings tab, you will see:
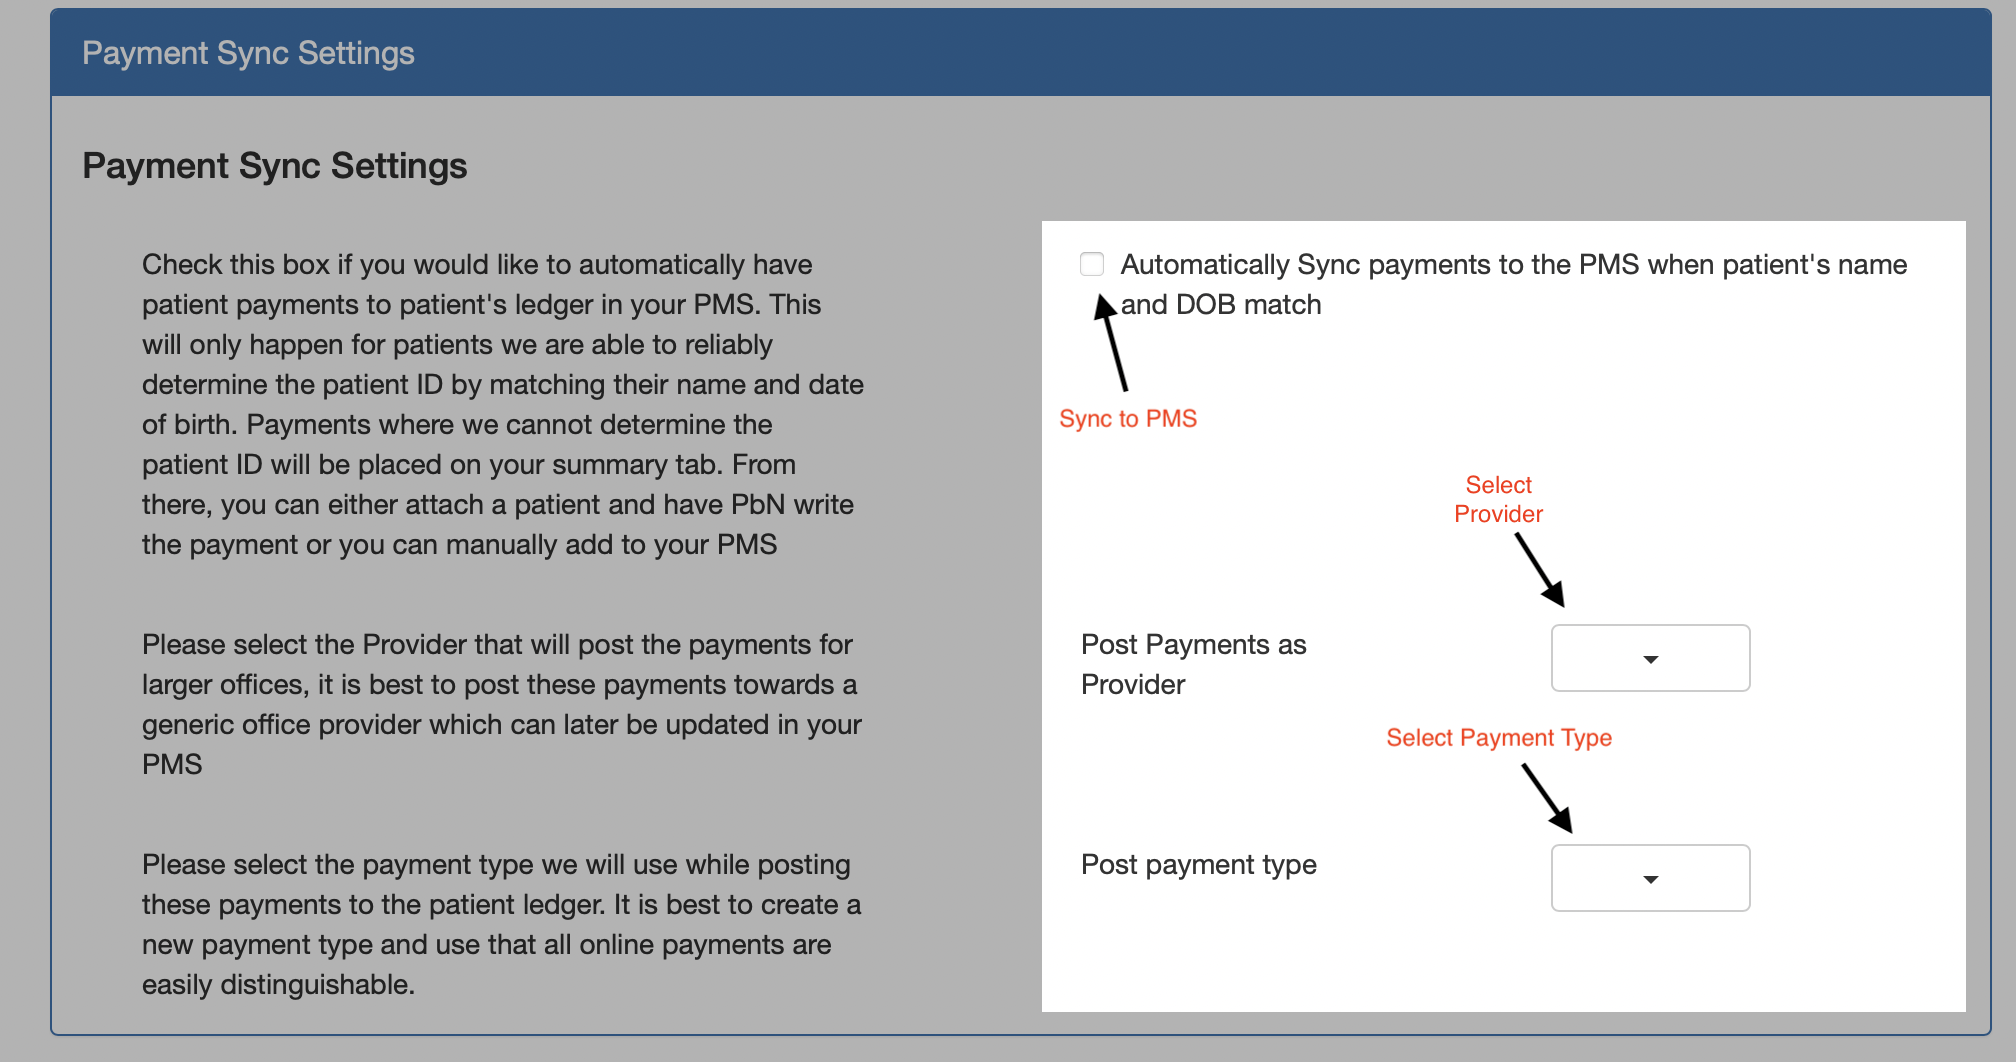
Payments Sync Settings
-
Check the box if you would like to automatically have patient payments synced to the patient's ledger in your PMS.
-
Select the Provider that will post the payments for larger offices.
-
Select the payment type we will use while posting these payments to the patient ledger. Creating a new payment type is best so these online payments are distinguishable.
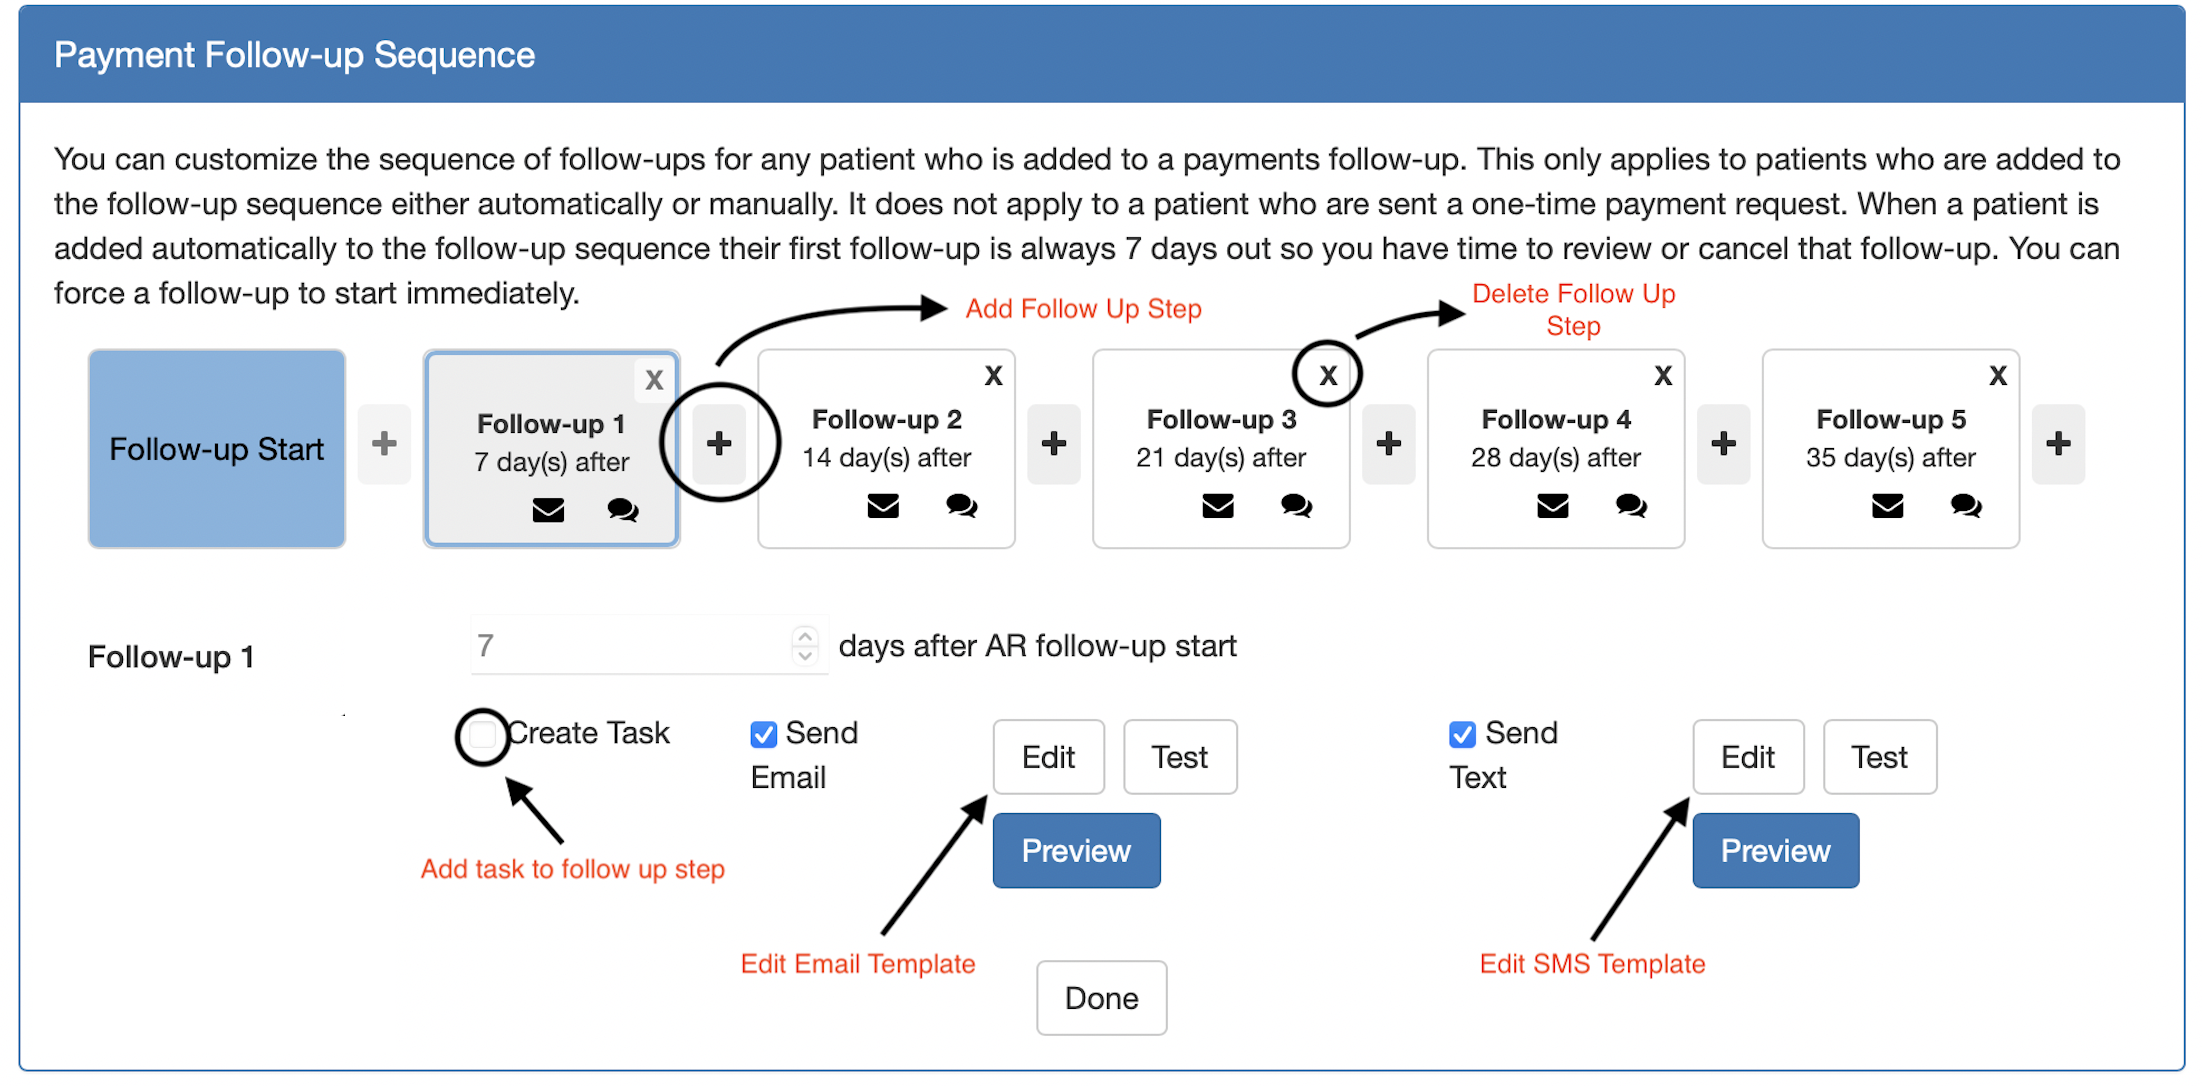
Payment Follow-Up Sequence
-
Automatically or manually add patients to a follow-up sequence. Patients will be notified via email and/or text.
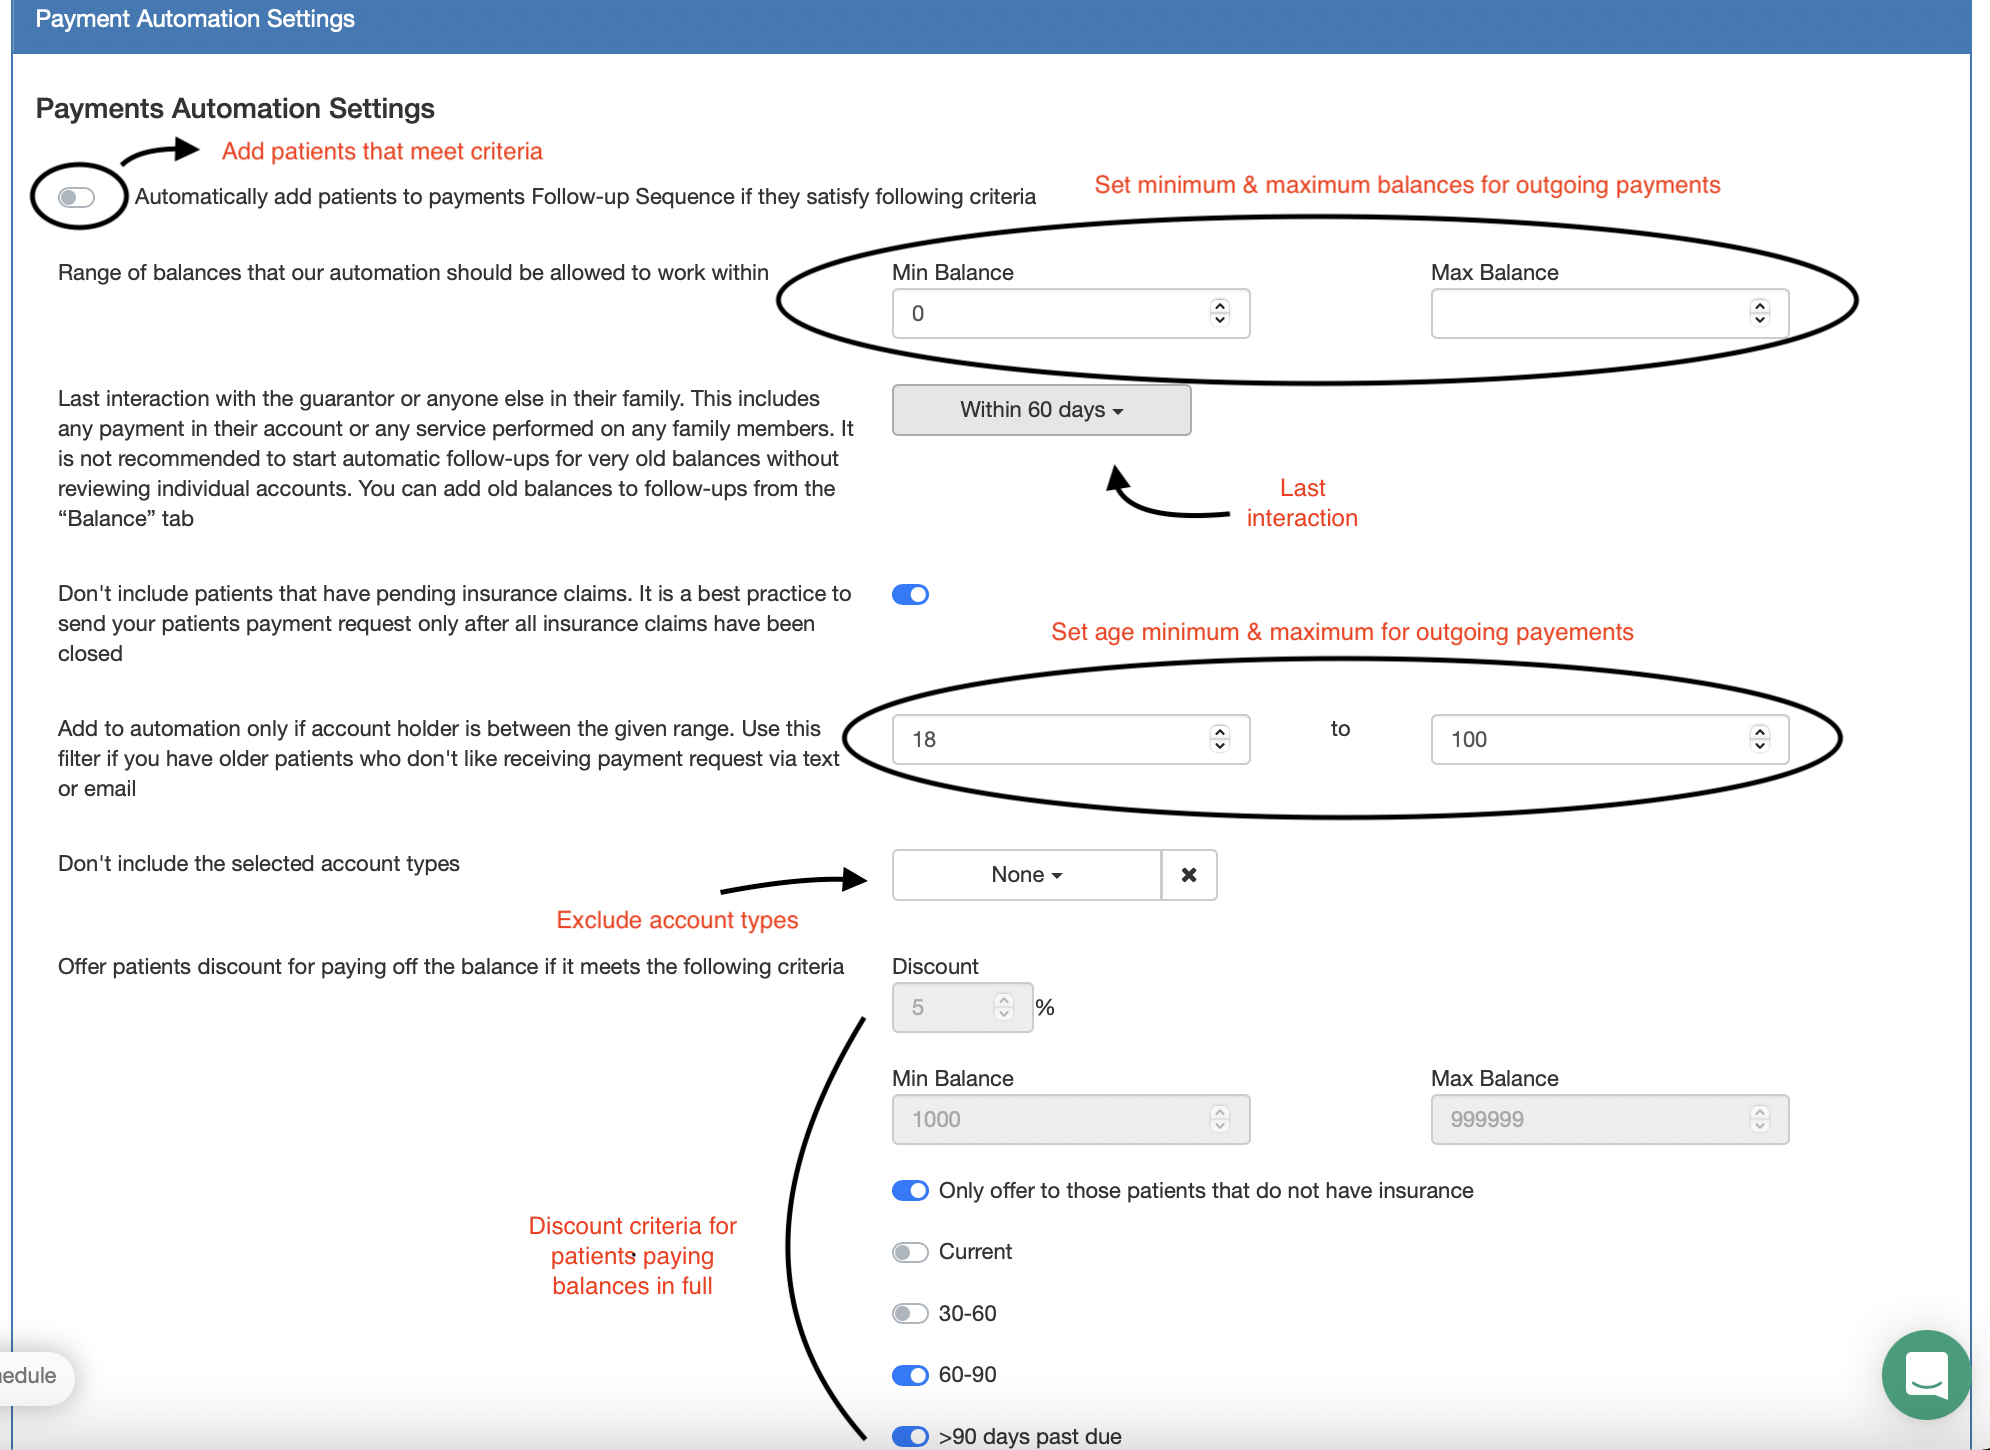
Payment Automation Settings
-
Automatically add patients to follow-up that meet the criteria set in this panel.
-
Set a minimum and/or maximum balance for outgoing payments.
-
Last interaction timeframe.
-
Include or don't include patients with pending insurance claims.
-
Set the minimum or maximum age for patients you'll send payment links to.
-
Exclude certain account types.
-
Create and set discount criteria for patients that pay off their balance in full.
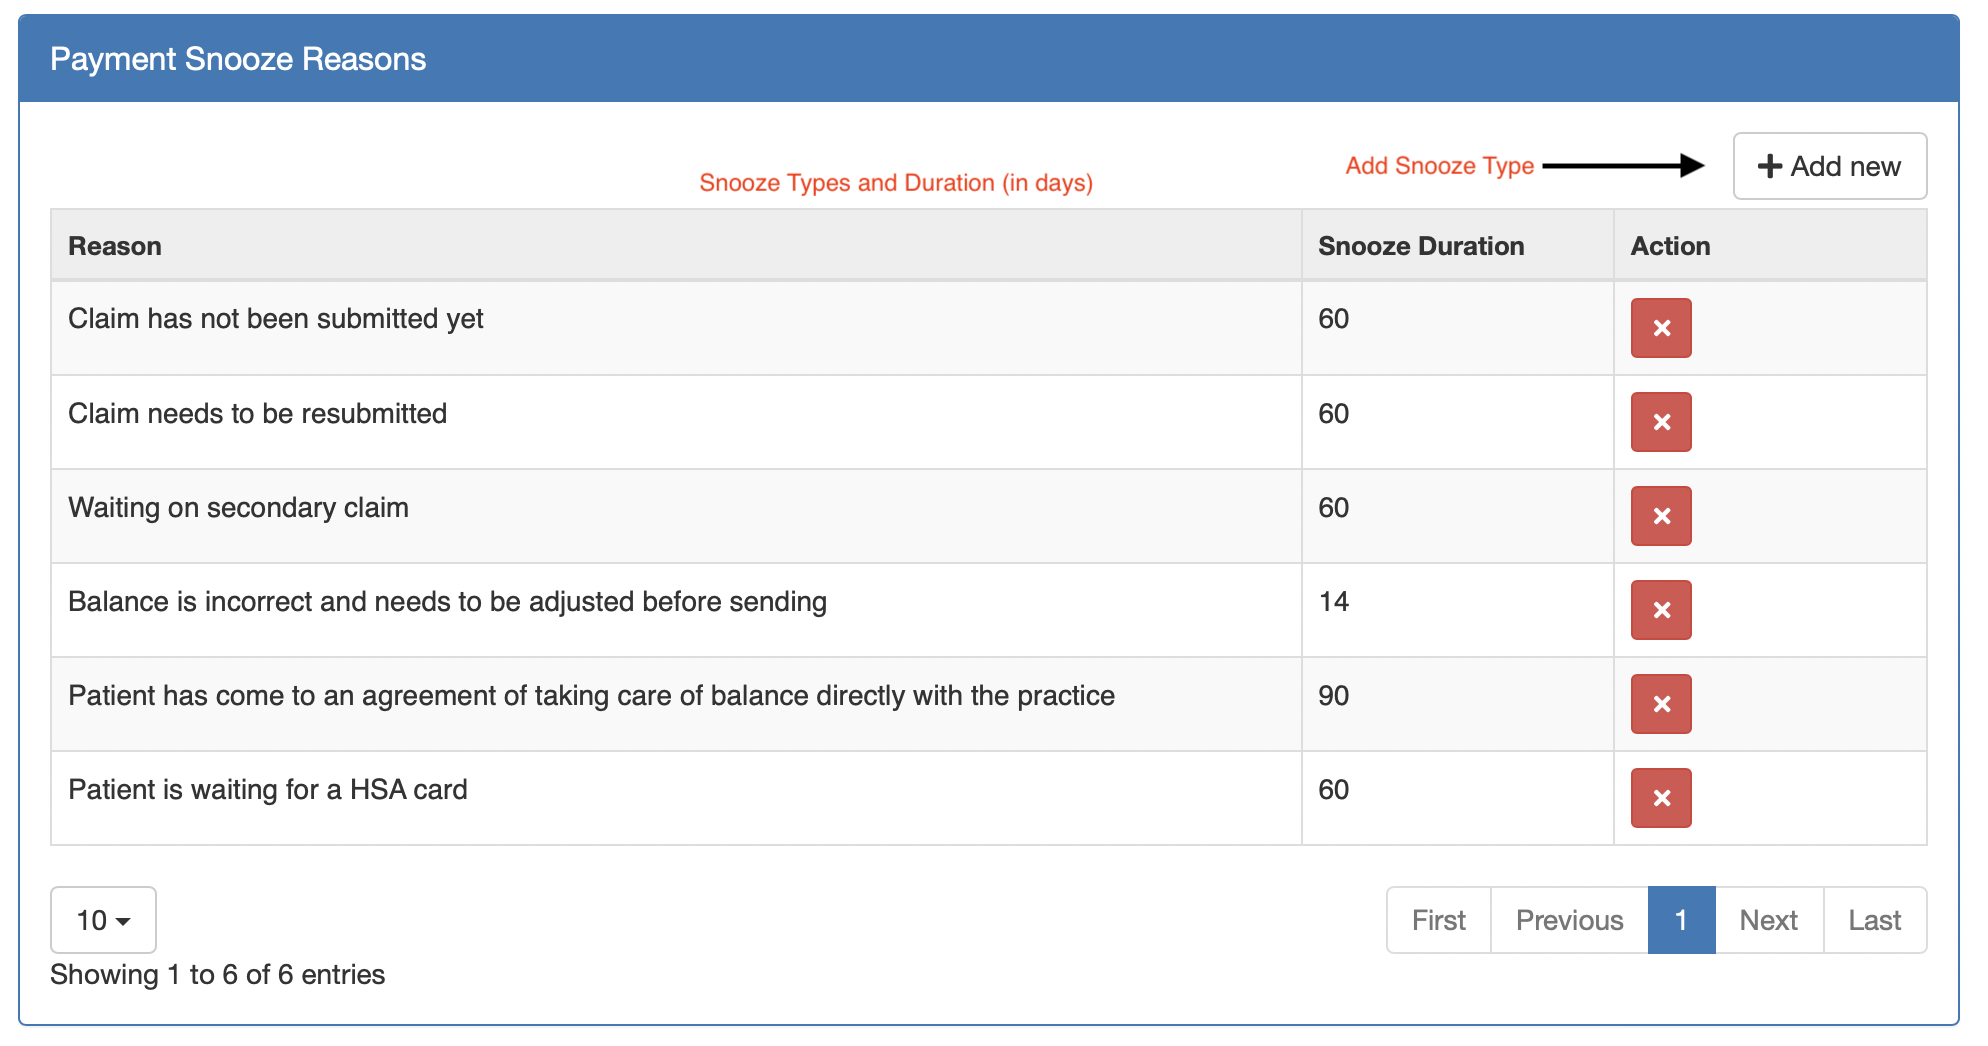
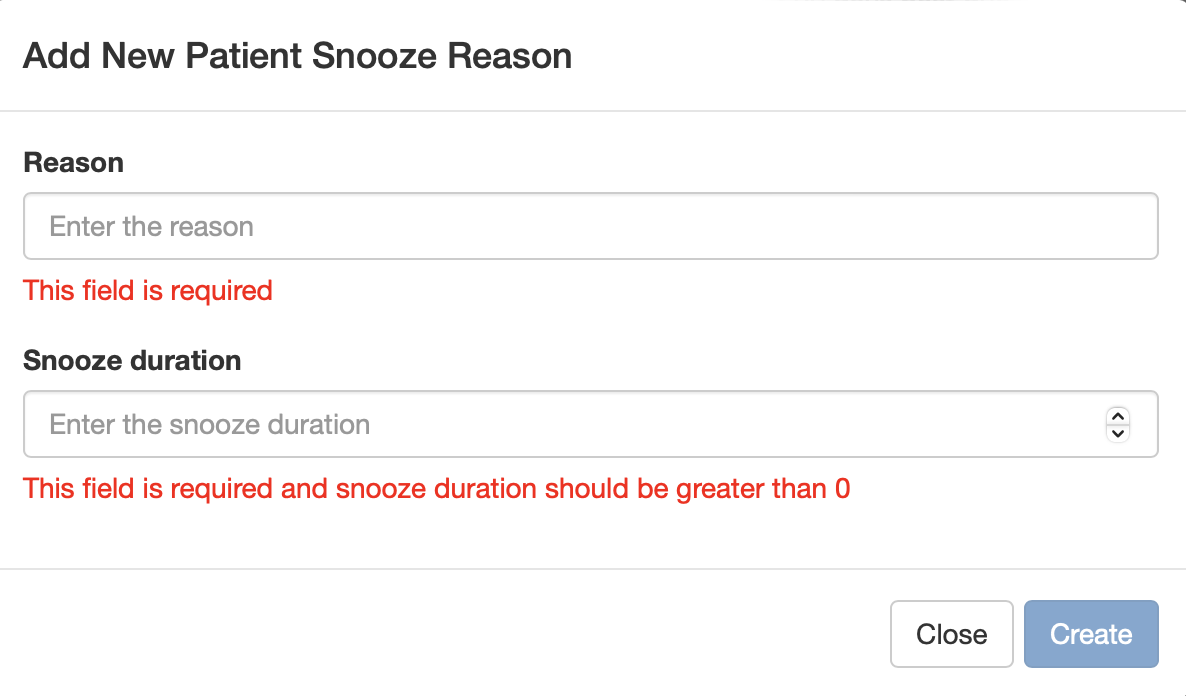
Payment Snooze Types
-
Within the payments feature, you can apply "snoozes" to certain patients who may need more time to pay for various reasons. If you encounter one of these reasons, you can create a snooze type in this panel that gives the patient and office extra time before restarting payment follow-up communication.
-
If you click Add new, enter the snooze reason and the duration in days that you would like to allow, and click Create.
 Did this answer your question?