- Help Center
- Templates and Messages
- Custom Campaigns
-
Getting Started
-
Users and Login Information
-
Templates and Messages
-
Schedule and Online Appointment Booking
-
Patient Information
-
Online Forms
-
Reputation
-
Practice IQ
-
Revenue IQ
-
Tasks
-
Phone IQ
-
Marketing IQ
-
Patient Flow
-
Payments
-
PBN Settings
-
Enterprise Pages
-
Eaglesoft Best Practices
-
Open Dental Best Practices
-
Dentrix Best Practices
-
Product Releases
-
Known and Resolved Issues
-
Additional fees and overages
-
PBN Apps
-
Insurance Verification
-
FAQ's
-
Patient Portal
Custom Campaign Recipient Selection
How to start a Custom Campaign from scratch.
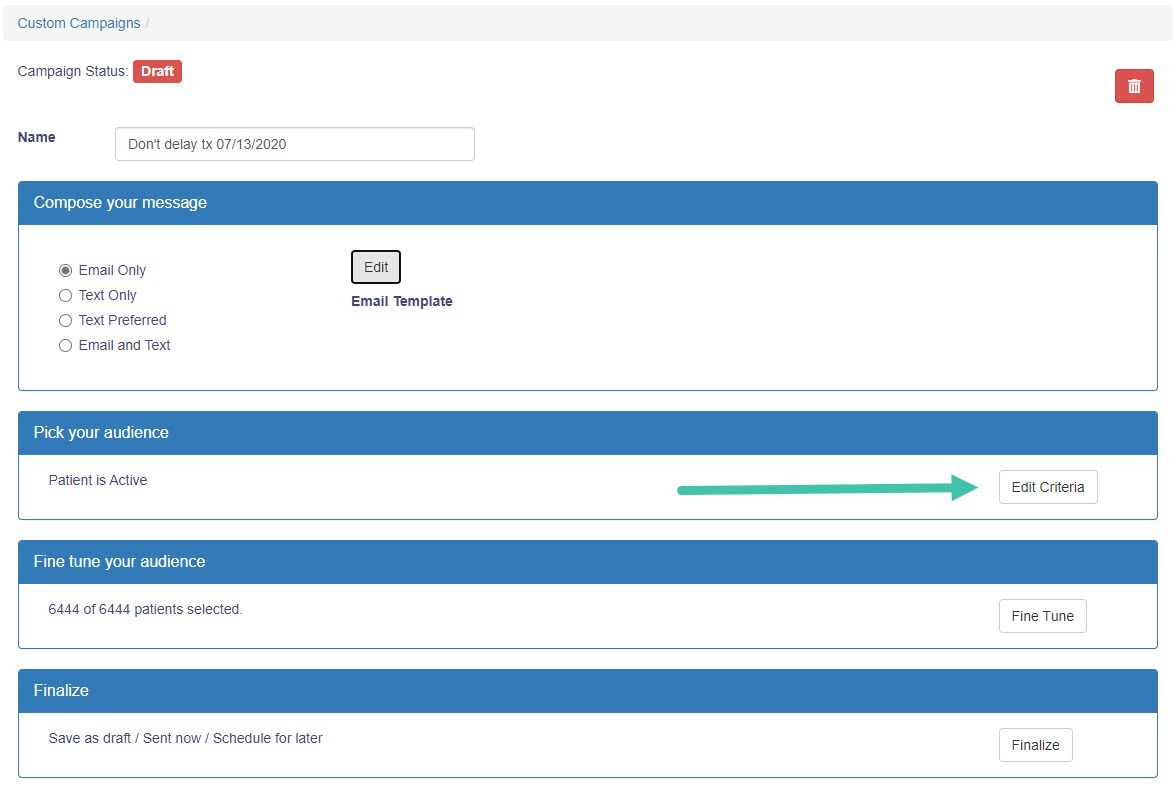
After selecting the desired template and the method of communication for a Custom Campaign, there is a panel to select the audience to receive the message.
Before selecting "Edit Criteria" the message would be sent to all patients that PBN is detecting as Active.

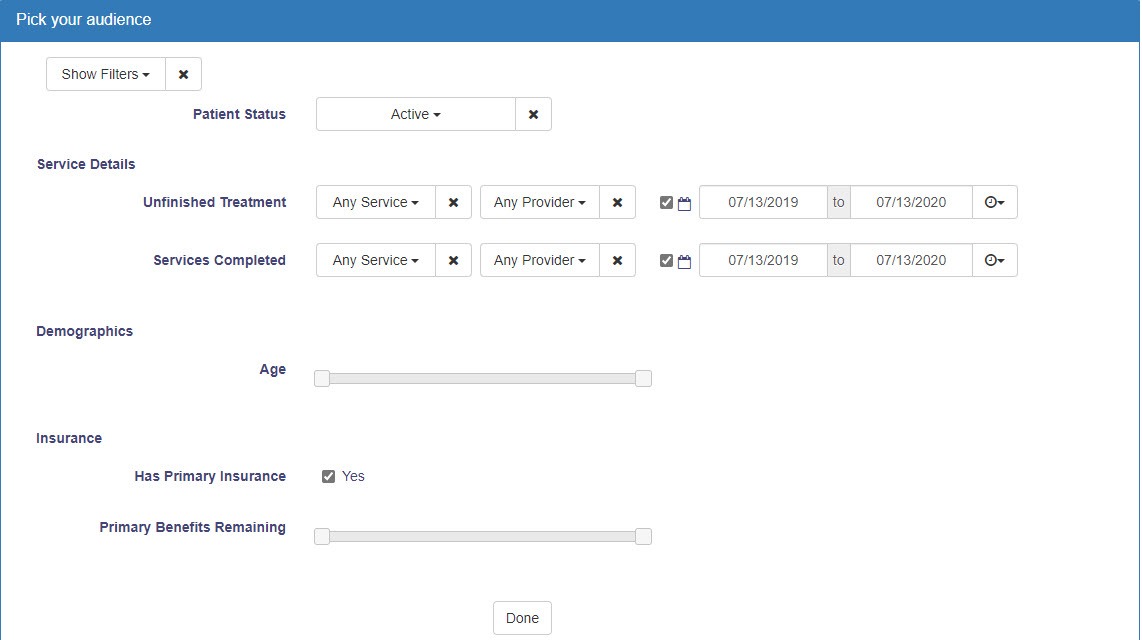
The image below (right click and select to open the image in a new tab) displays all of the filter options.

Depending on the filters selected, additional items are displayed to select dates, service codes, benefit dollars, etc.

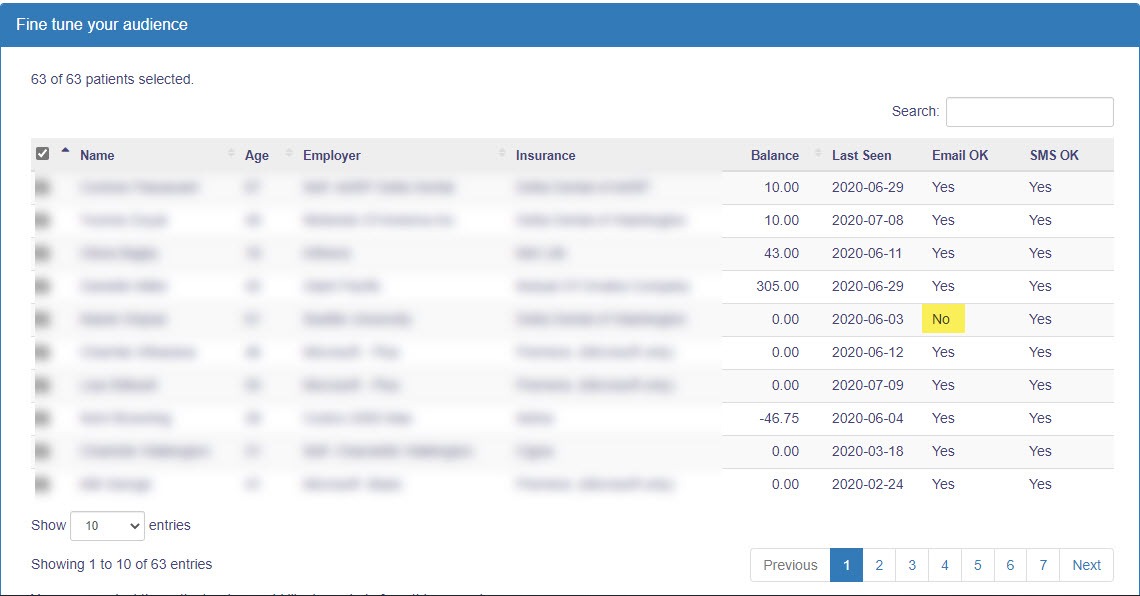
The following "Fine Tune" panel will display all patients that meet your selected filters. This panel gives you one more chance to deselect any additional people.
If in the list there is a "No" for the type of message you are sending, that person will not get the message even though they are on this list.
